
This guide will walk you through installation notes, troubleshooting tips, and special features for installing your VHEDIA head unit into a Mitsubishi Pajero 2006-2019 (NS, NT, NW, NX).
Installation Video
Which Wire Goes Where


Common Issues & Fixes
Factory Camera Settings
Factory Reverse Camera:
Go to Settings > Car Infotainment > About Device > Fill in password 8878 > Backcar Setup.
Cam Type, select (0 CVBS) > CamFormat, select (1: NTSC or 2: PAL) choose the one based on what your factory camera uses but majority uses NTSC.
Tap SAVE > OK to reboot.
Your reverse camera should start working after the reboot.
Vhedia/Aftermarket Reverse Camera:
Go to Settings > Car Infotainment > About Device > Fill in password 8878 > Backcar Setup.
Cam Type, select (1 AHD) > CamFormat, select (3: 720P-25 or 4: 720P-30).
Tap SAVE > OK to reboot.
Your reverse camera should start working after the reboot.
Go to Settings > Car Infotainment > About Device > Fill in password 8878 > Backcar Setup.
Cam Type, select (1 AHD) > CamFormat, select (5: 1080P-25 or 6: 1080P-30).
Tap SAVE > OK to reboot.
Your reverse camera should start working after the reboot.
Reverse Camera Not Working After Install
Are you using the extra patch cable we have on the kit? If yes, please see how to wire the patch cable below:
Orange & Black Cable - connect the orange and black cable to the main 20-pin plug harness.
Black Cable - connect the black GND cable coming off the grey 6-pin plug harness that also has the purple CAM IN RCA cable on it.
Red Cable - connect the red cable to the main 20-pin plug harness.
Reference photo:

Factory USB Ports Not Working
Use the USB retention cable included in the kit. Simply plug one end of this cable into the factory USB plug in your vehicle, and then plug the other end into one of the USB inputs on the back of the head unit. This allows the factory USB port to function normally with the new system. No extra power wires (ACC/GND) are required.
See attach the Youtube video for your reference (6:18 - 6:39)
Patch Cable Doesn’t Have Any Compatible Plugs from Car’s Side?
We will have to send you a different cable kit. Reach out to us on our support channels so we can assist.
How To Wire Up the New Cable Kit
Connect these two small plugs:
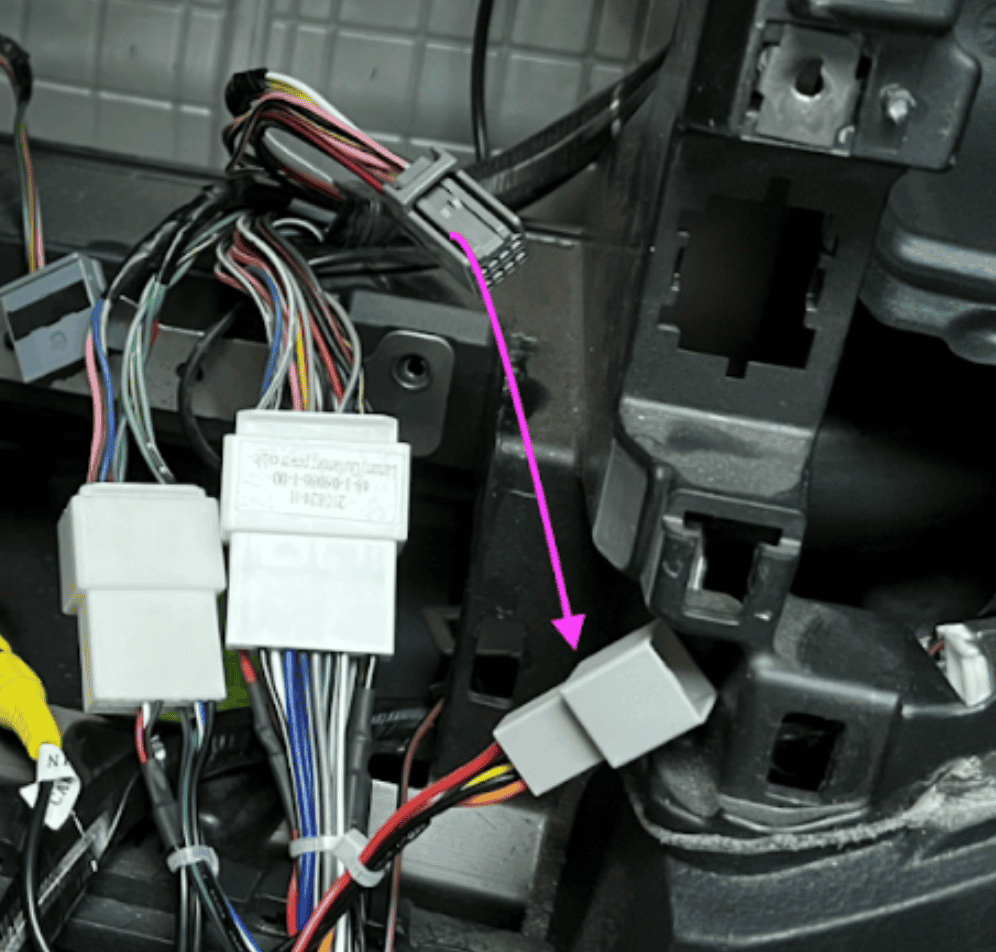
If the head unit remains on even when the key is not in the ignition, unplug this small plug from the harness:

No Sound on Rockford System
Please make sure the system is set to Mode 2 under Type and Model Set.
On your head unit, go to Apps.
Scroll to the end and open the app called Control Setting.
Scroll to the bottom, find Mode Type, and select Type 2.
Sorting the Reverse Camera Issue
Head Unit Screen's Flashing On and Off
Reverse Camera Behaving Strangely
Intermittent Signal When Shifting Into Reverse
1. Locate the CANBUS Plugs
Behind the head unit, you’ll find two small SM plugs coming from the CANBUS decoder — they’ll usually be disconnected by default.
2. Identify the SM Plugs on the Main Connectors
Check the main 20-pin connector and the large white plug that connects to the vehicle’s factory wiring. Each of these will have its own SM plug.
3. Connect the SM Plugs Properly
Take the SM plugs from the 20-pin connector and the white plug, and plug them into the two SM plugs coming from the CANBUS decoder.
4.Test Your System
Turn on the car and test the reverse camera and screen.

Fixing the Steering Wheel Control Issue
If you're experiencing issues with the steering wheel controls (SWC) on your head unit, this guide will help you resolve the problem. Even though the head unit is equipped with a CANBUS, this specific model relies on key lines for SWC data rather than using CANBUS for the steering controls.
1. Re-learn the SWC on the head unit. See the video guide below:
If Step 1 didn't work, swap the Key Lines:
Start by plugging the Key 1 wire into the designated port for SWC.
Test your steering wheel controls to see if they function correctly.
If the controls do not work, unplug the Key 1 wire and try connecting the Key 2 wire to the same port.

Need further assistance? Reach us out on our support channels:
Live Chat on our website (https://vhedia.com.au/): Mon–Fri, 7 AM–5 PM (Perth time)
Phone Support: 1800 577 415, Mon–Fri, 7 AM–3 PM (Perth time)
Email: hey@vhedia.com.au