
This guide will walk you through installation notes, troubleshooting tips, and special features for installing your VHEDIA head unit into a Toyota Landcruiser 200 Series 2015-2021 (GXL and Altitude).
Installation Video
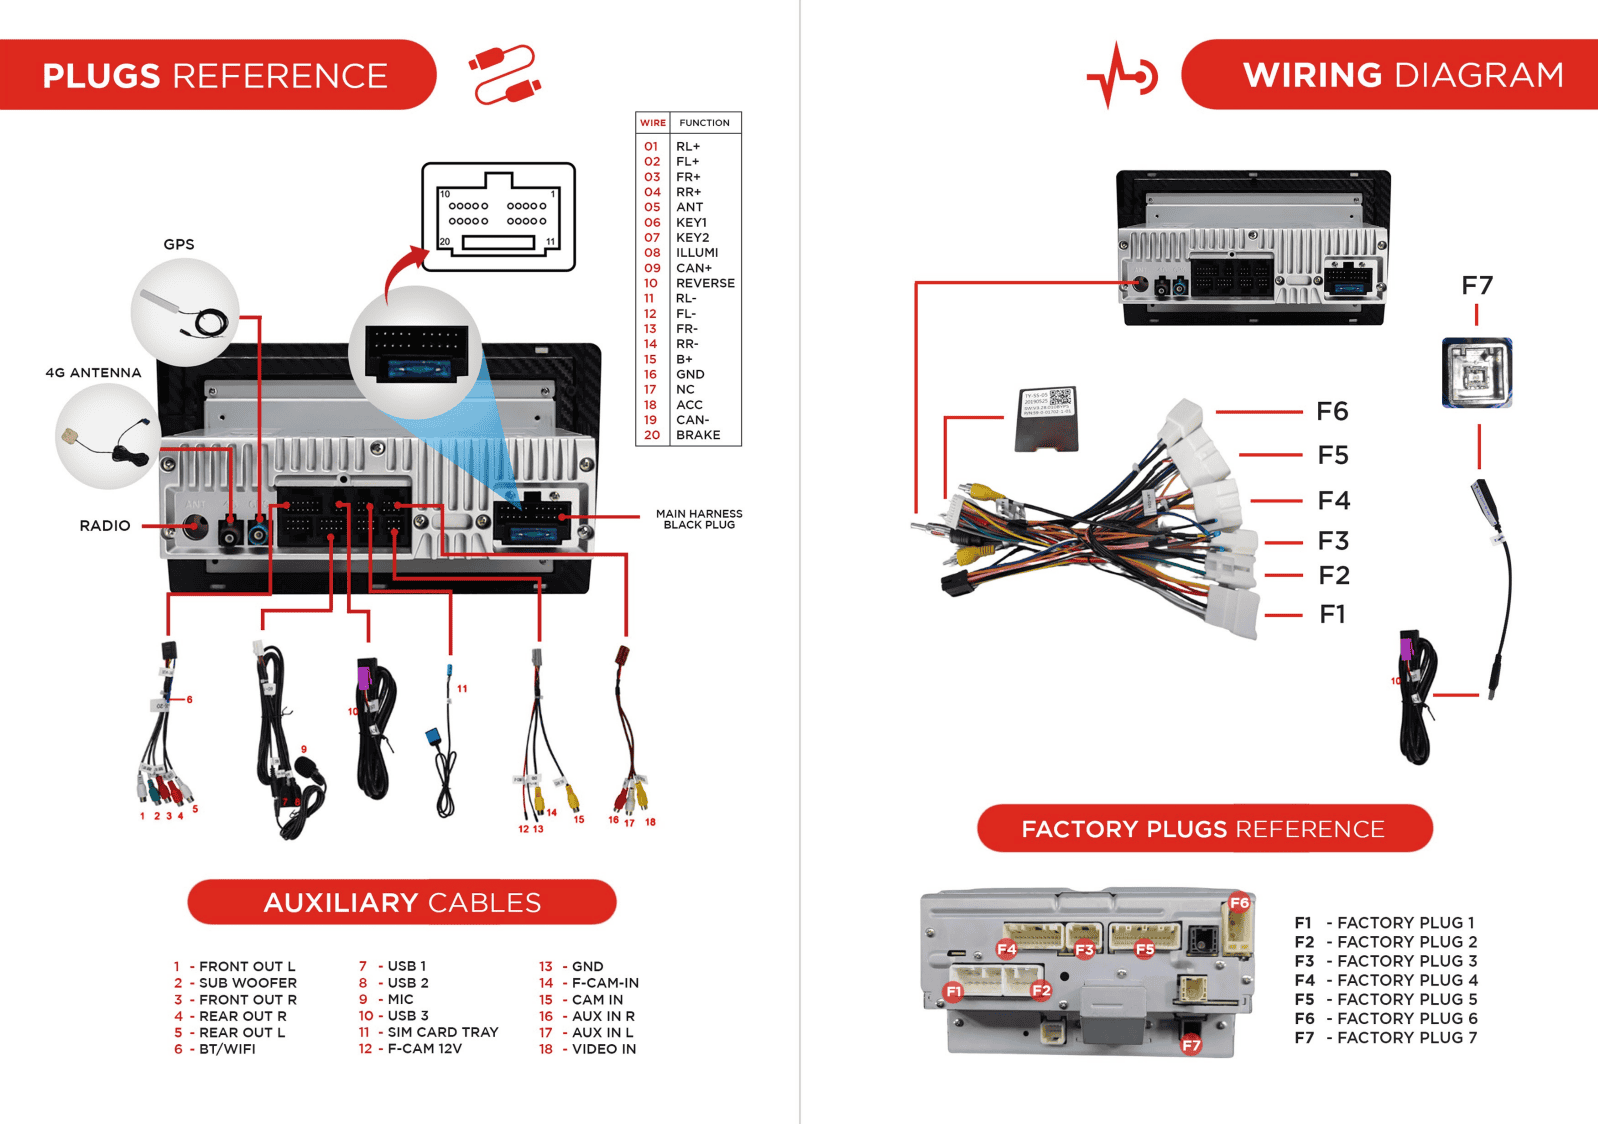
Which Wire Goes Where
Common Issues & Fixes
Reverse Camera Showing No Signal (Triggering but No Display)
The reverse camera is triggering but showing No Signal error, even though you have the correct yellow RCA plug connected.
Unplug the black plug from the car side that is connected to the main harness, as shown in the photo below. This black plug is not intended for the head unit and should not be connected to our harness. It is meant for another function, not for the radio.


1. Access the Head Unit
Ensure the vehicle is turned off and the head unit is safely accessible.
2. Identify the Black Plug
Find the black plug connected to the main harness. This black plug from the car side is fitted to one of the plugs on the main harness but it is not intended for the head unit and should not be connected to the main harness.
3. Unplug the Black Cable
Carefully unplug the black cable from the main harness. Ensure not to disturb other connections.
4. Test the Reverse Camera
Turn on the vehicle and shift into reverse to test if the camera signal is now displayed correctly on the head unit.
5. Secure Connections
If the reverse camera is now working, ensure all connections are secure.
6. Final Checks
Perform a final check by shifting into reverse a few times to confirm the issue is resolved.
Factory Camera Settings
Factory Camera – Static Display
If the camera works but the screen shows static:
Go to Settings > Car Infotainment > About Device > Fill in password 8878 > Backcar Setup.
Cam Type, select (0 CVBS) > CamFormat, select (1: NTSC or 2: PAL) choose the one based on what your factory camera uses but majority uses NTSC.
Tap SAVE > OK to reboot.
Your reverse camera should start working after the reboot.
Steering Wheel Controls Not Working
If you've upgraded your Toyota LandCruiser 200 Series (2016–2021 GXL, Altitude) with a VHEDIA head unit but the steering wheel controls (SWC) aren't working this guide covers what might be going on and how to fix it.
While most vehicles use CANBUS to communicate with steering wheel controls, some Toyota LandCruiser models — especially in the GXL range — may require a different setup or a specific harness to get the buttons working properly with your VHEDIA head unit.
1. Contact VHEDIA Support
Before making any wiring changes, please reach out to our Customer Support team via:
📞 Phone (1800 577 415)
📧 Email (hey@vhedia.com.au)
💬 Live Chat (www.vhedia.com.au)
We'll help evaluate your vehicle’s setup and determine if a specific harness is needed for your steering wheel controls to function correctly. In most cases, once we confirm your vehicle’s configuration, we’ll send out the correct harness if required.
2. Install the New Harness (If Provided)
Once you receive the new harness from us, follow these steps carefully:
Disconnect the wire labelled "AD" → Then connect it to the plug labelled "AD2"
Disconnect the wire labelled "Reverse" → This step is optional and only needed for troubleshooting.

Understanding Patch Cables
In this guide, we take a closer look at patch cables in the Toyota LandCruiser 200 Series and how they affect head unit installations. If you run into issues with reverse triggers, steering wheel controls, and AM/FM reception — and often the solution comes down to removing or adjusting patch cables.
What You’ll Learn:
What patch cables are and how to identify them
Why some factory patch cables need to be unplugged
How reverse trigger & steering wheel control signals run through patch cables
Checking AM/FM reception when modifying patch cables
Practical tips for testing and ensuring everything still works after changes
Why This Matters:
Patch cables can make or break your installation. Understanding when to keep them in and when to remove them ensures your Vhedia head unit works seamlessly with factory features.
Video Guide:
Need further assistance? Reach us out on our support channels:
Live Chat on our website (https://vhedia.com.au/): Mon–Fri, 7 AM–5 PM (Perth time)
Phone Support: 1800 577 415, Mon–Fri, 7 AM–3 PM (Perth time)
Email: hey@vhedia.com.au