
This guide will walk you through installation notes, troubleshooting tips, and special features for installing your VHEDIA head unit into a Toyota Prado 150 2014-2017.
Installation Video
Extra Install Instructions
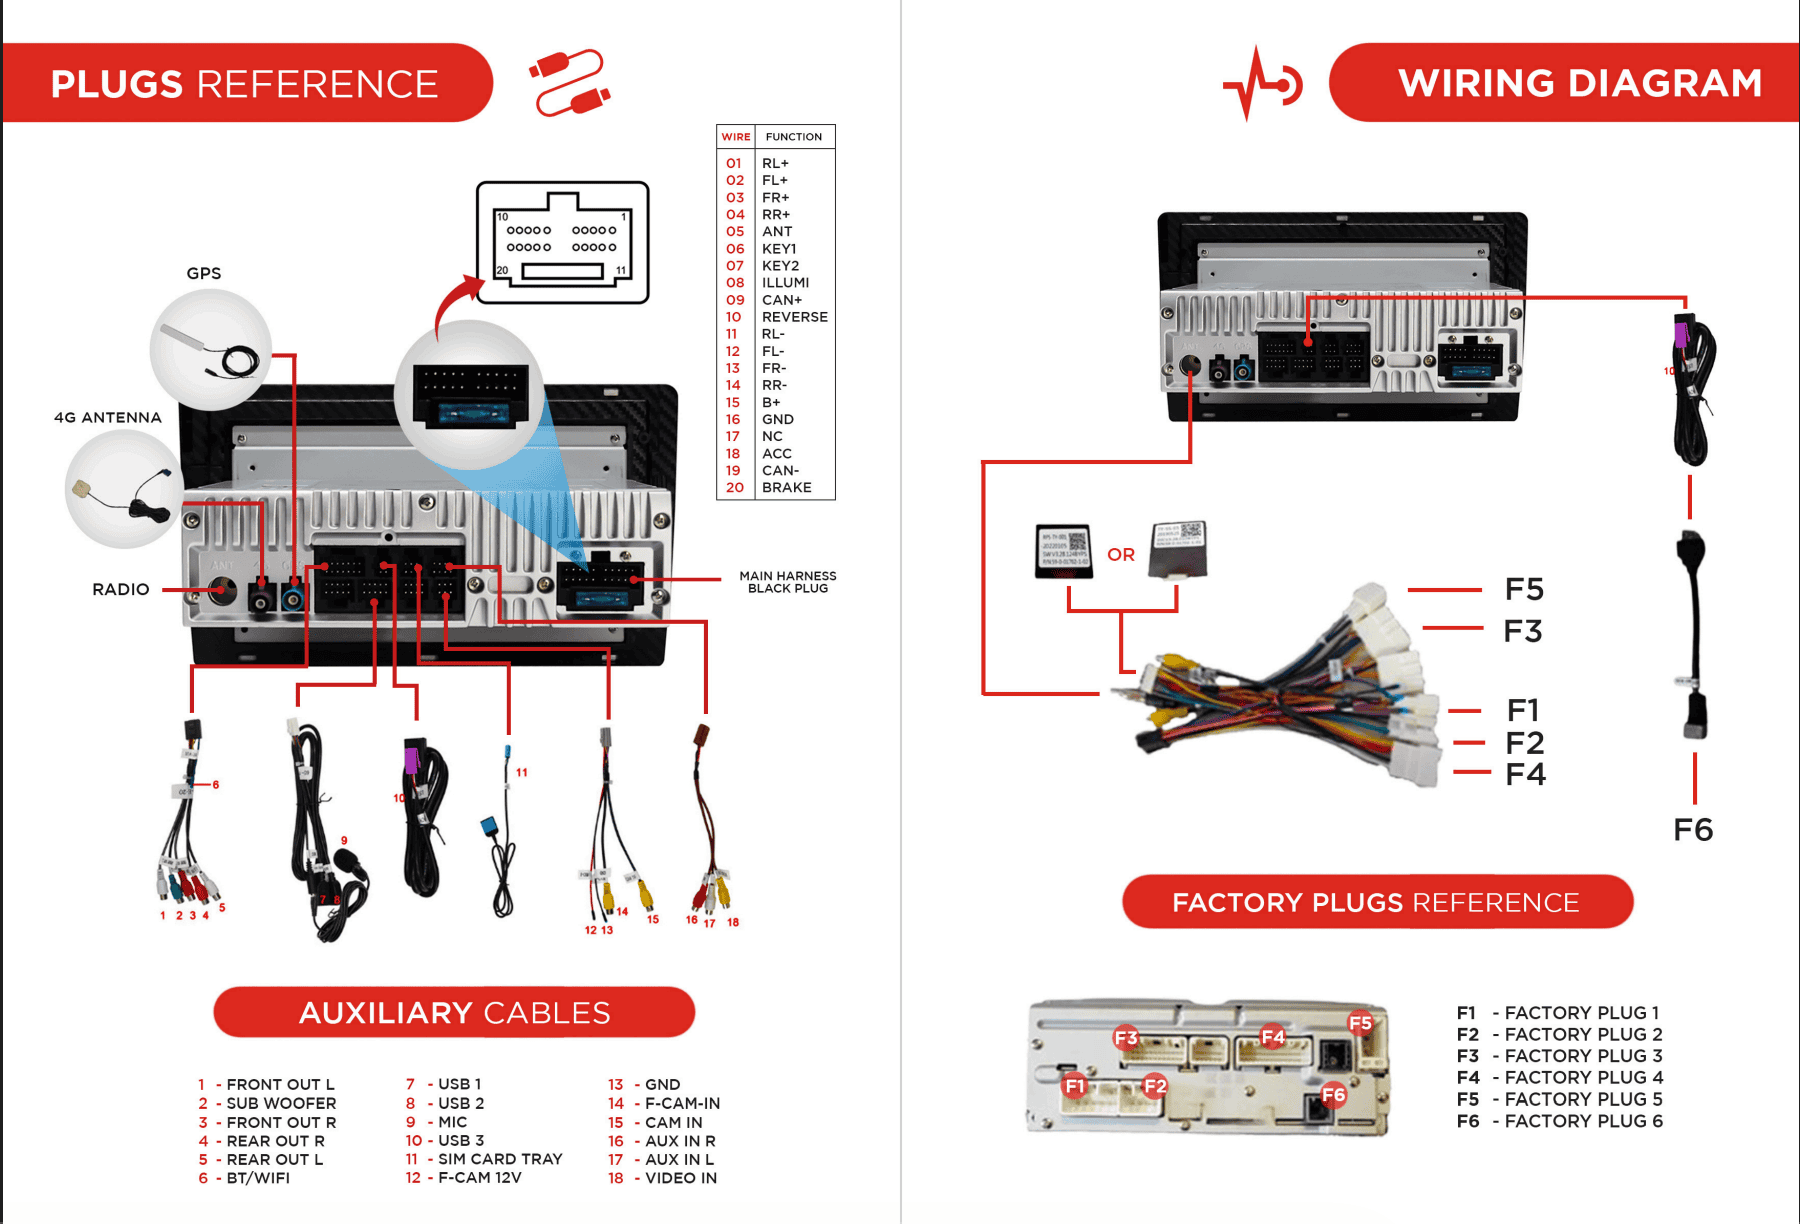
Which Wire Goes Where
Common Issues & Fixes
Rear Speakers Not Working
If your rear speakers are not functioning/working correctly:
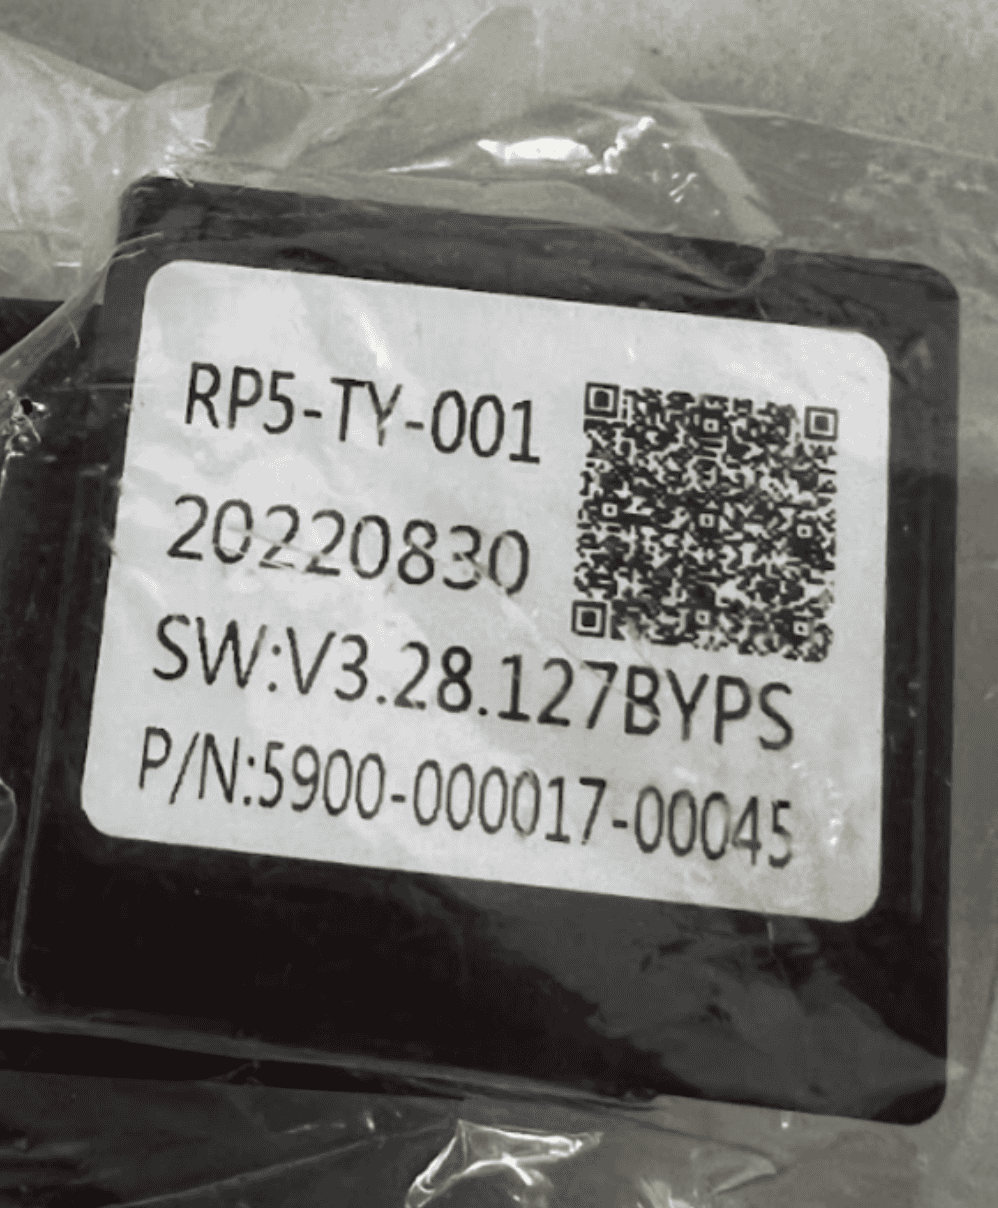
Please check the CANBUS code you have in the main harness. It should say RP5-TY-001 or TY-SS-05.
Once done, make sure you have the correct canbus setting on the head unit.
Go to Settings > Car Settings
Factory Settings and enter 126 for passcode
Go to CAN > Can Bus setting
Select 2 TOYOTA/CAMRY/RAV4 (Simple) and hit OK
VIDEO GUIDE:
Go to Settings > Car Infotainment
Scroll to bottom and tap About Device
Tap the gear icon and enter 8878 for password
Go to CAN TYPE
Scroll and select 3. TOYOTA
Hit SAVE and wait for head unit to reboot
VIDEO GUIDE:
Still No Sound After Selecting Correct CANBUS Setting
Go to Settings > Car Settings.
Enter Factory Settings (passcode: 126).
Navigate to CANBUS > Advanced.
Manufacturer: Raise
Category: Toyota
Model: Prado 2018 (works for all Prado models)
Tap OK.
Go back to your home screen.
Go to Apps > look for app called "Amplifier".
Adjust the volume and see if it sound now works.

Adjusting Factory Amp Settings
Go to Apps > Find and open Car Info.
Go to Preferences > Select AMP SET.
Adjust the settings per your preference.
VIDEO GUIDE:
Car Stuck in Reverse
Unplug the two cables labelled “REVERSE IN”.
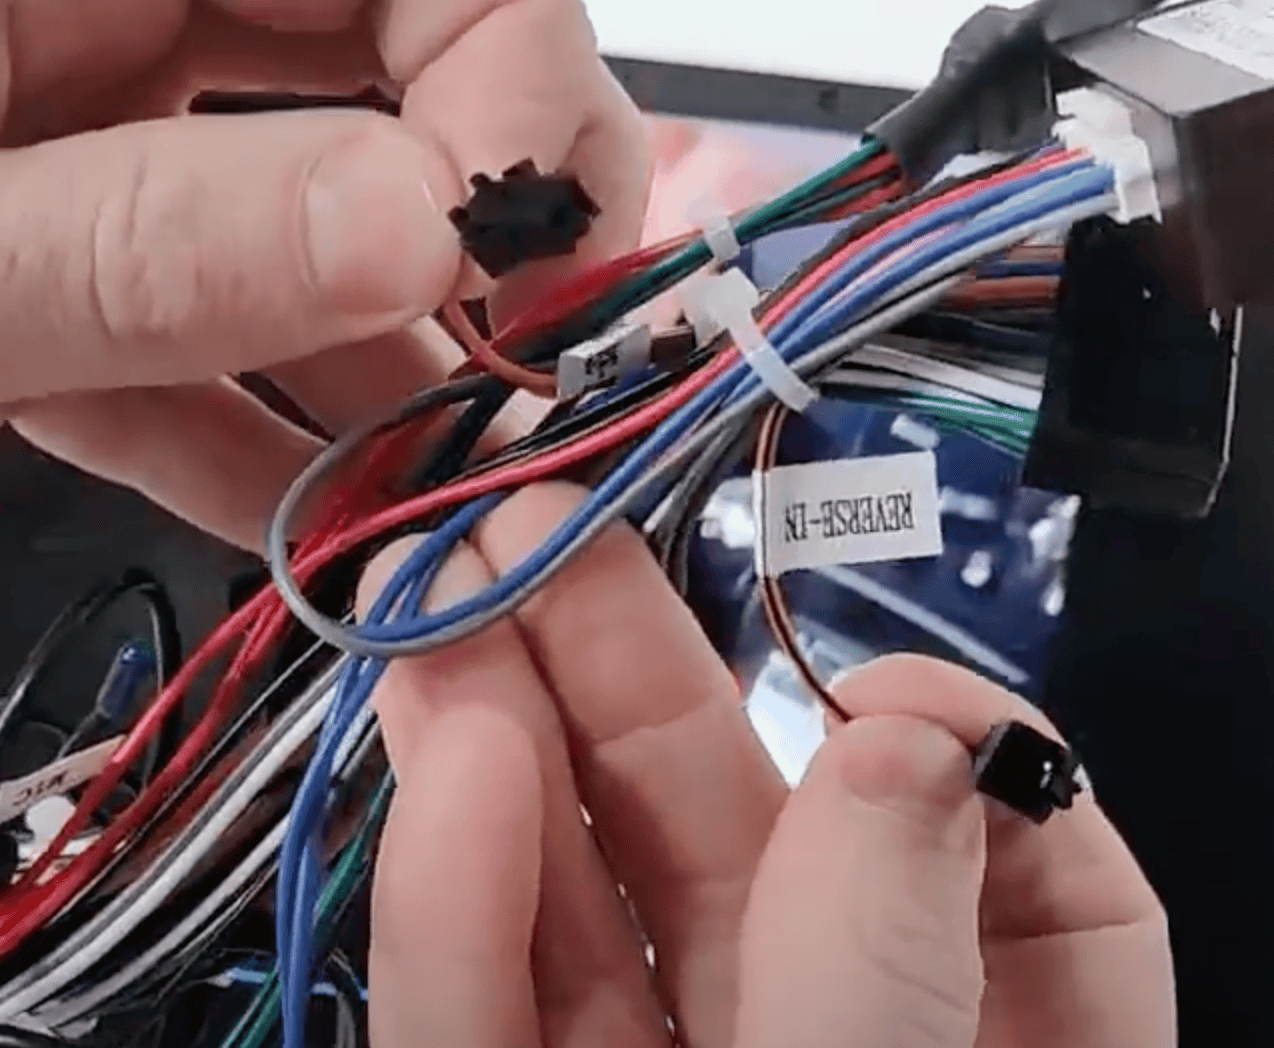
This should resolve the issue.
"No Signal" Error When Putting Car On Reverse (Factory Camera)
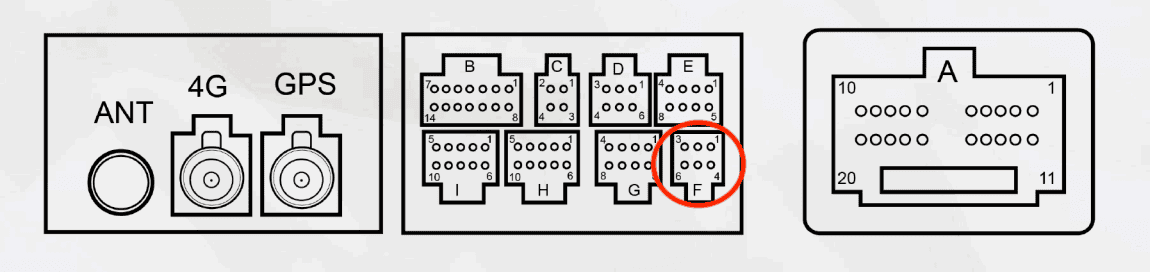
Make sure the 6-pin grey plug is connected to the correct port. (See reference picture below)
There are two black CAM IN wire. Make sure that the black wire with a yellow RCA that you connect to the purple CAM IN wire is the one that goes with a plug from your car side or goes to CANBUS.
No Radio Reception (Factory Antenna)
If your factory antenna looks like the same on the reference photo below, you need to turn on the EXT AMP setting from the head unit so the antenna will receive power.
VIDEO GUIDE:
Factory AM/FM Radio Quality Issue
This guide provides instructions for installing the Toyota Dual Radio Plug.
When you receive our kit, you'll find a dual radio plug adapter included. This component is designed to enhance radio reception in our head unit. While in the future, all our harnesses will come equipped with the dual one, if what you have in our cable harness is a single one, follow these instructions for optimal performance.
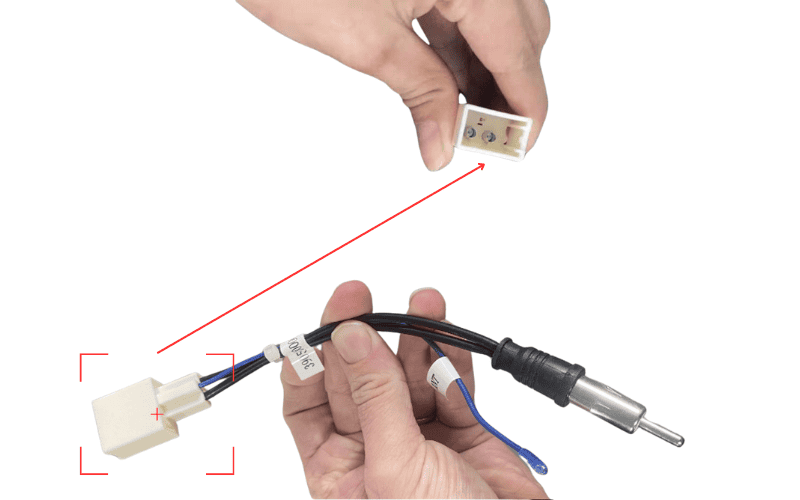
Wiring Diagram:

Installation Steps:
Verify Compatibility:
Before proceeding, ensure that the Toyota Dual Radio Plug is compatible with your vehicle's factory radio. If uncertain, check the factory radio plug or reach out to us for assistance.
Preparation:
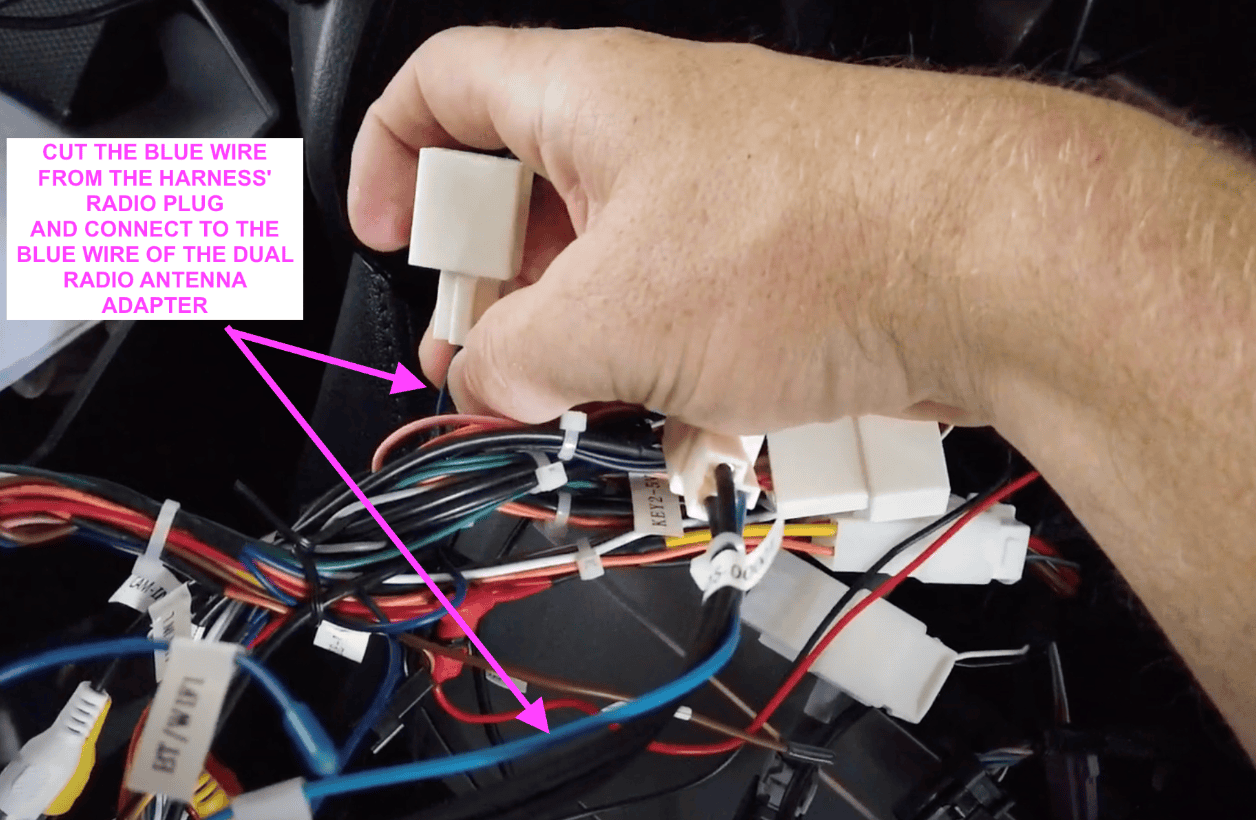
If you have the dual radio plug adapter separate from the harness, you'll need to integrate it to the radio plug on our harness for improved reception.
Locate the blue wire from the radio plug of our harness.
Cut the blue wire.
Connect the blue wire from the dual one to the cut end of the old blue wire you just cut.
5. You're done! Test the radio and should be as good as the factory one.
Factory Camera Settings
Can't Change The 360 View Screen After Installing Head Unit (Kakadu)
Install back your factory head unit, change the camera settings to your preference and install our head unit back in.
How to Fix Steering Wheel Controls and Navigation Issues
OVERVIEW:
Steering Wheel Controls (SWC) not functioning.
Navigation prompts appearing without using any navigation apps from the head unit or phone.
FIX:
Steering Wheel Controls (SWC)
Locate the Wires:
Find the grey and black wire from the main harness.
Locate the loose brown and black wire.
Connect the Wires:
Connect the grey and black wire from the main harness to the loose brown and black wire.
Connect the grey wire to the loose brown wire.
VIDEO GUIDE:
If the issue continues even after ensuring the wires are connected correctly, please re-learn the Steering Wheel Controls from the settings. You can find a guide on how to do this here: https://vhedia.tawk.help/article/m-series-setting-steering-wheel-controls
Navigation
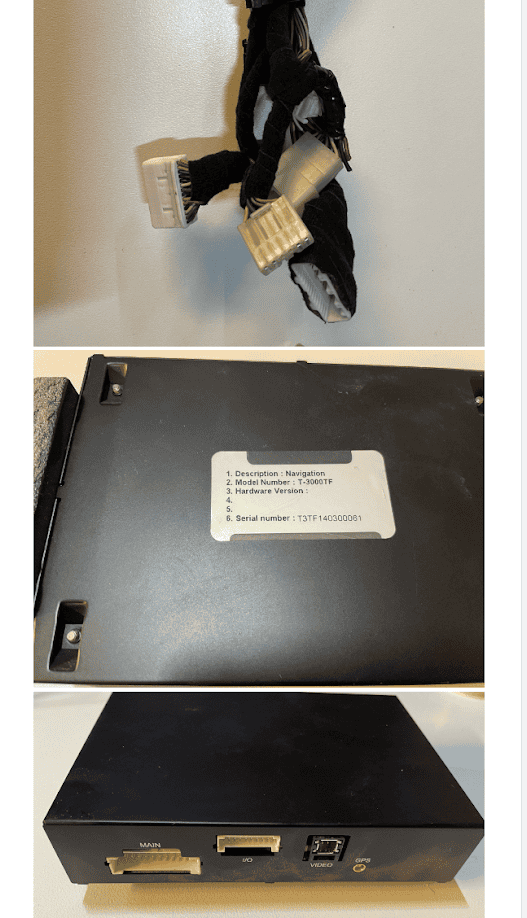
Identify the Factory Navigation System:
Determine if your Prado has a factory navigation system installed. This is usually an optional feature.
If present, the factory navigation system will have 3-4 plugs piggybacking off some of the plugs connected to the head unit harness.
Remove the Factory Navigation System:
Carefully remove the factory navigation system from your Prado.
Reference photos of the factory navigation and its plugs:
3. Connect the Factory Plugs:
Connect the plugs from the adapter cable on the factory navigation system to the head unit harness.
FINAL CHECKS:
Restart the Head Unit:
Turn off the car and restart the head unit to ensure all changes take effect.
Confirm SWC Functionality:
Test all the buttons on your steering wheel to ensure they control the head unit as expected.
Test Navigation:
Use a navigation app from the head unit or your phone to confirm that navigation prompts are working correctly.
Need further assistance? Reach us out on our support channels:
Live Chat on our website (https://vhedia.com.au/): Mon–Fri, 7 AM–5 PM (Perth time)
Phone Support: 1800 577 415, Mon–Fri, 7 AM–3 PM (Perth time)
Email: hey@vhedia.com.au